Much of you may know this already but for those of you who don't
here's a little tip!
Just the other day a blogger friend of mine, was having trouble with her computer,
she was not able to upload pictures unto her blog for some odd reason.
So an idea came to me to help her out, good thing I was still familiar with the "how to's" on the manual use of placing an image html code!
So here goes folks, should you ever find your self stuck this way too, this is what you'll do:
This little trick works especially well, if you already have the picture on an existing website or blog.
First find the image you are trying to get unto the website/blog, right click on it you will be able to
view the image info:
If it's a picture that you already have on an existing, website/blog Right Click on the image to
"View image info" click on "view image info".
You'll see a pop up Simular to this:
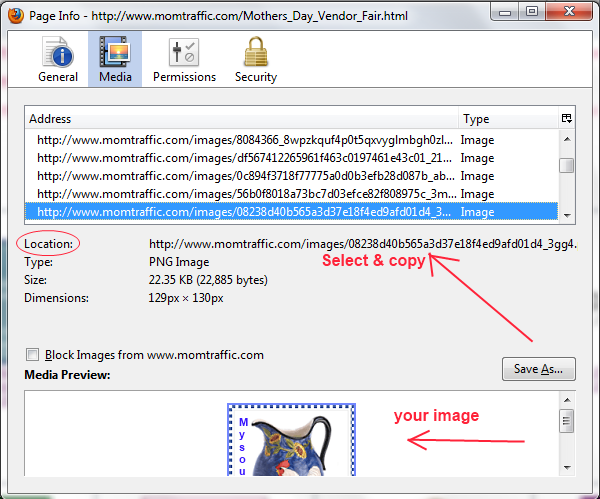
Select & Copy the link in the location as shown above,
then place it in the "html" section of your blog right next to the "text"/ or words you would like a picture placed.
Below: you'll find the yellow highlighted area to the opening & closing tag of an image html code.
Remove All Asterisk after code has been placed, and close up spaces, the only space that
should remain is the space between the (img src)
Hope that helps should you get stuck in uploading images to your blog or website :-)
Please leave Comments below should you need any additonal help with this
One quick Tip: place the html code <*br*> between the images and text to space down ;-)
Like this <*img src*="http://www.momtraffic.com/images/08238d40b565a3d37e18f4ed9afd01d4_3gg4.png"><*/img*>
Have a nice day :)
~ Brigitte


No comments:
Post a Comment